I’m not going back into the soap business. I don’t miss all that lifting, mixing, and pouring that goes into the process of making a couple hundred pounds of handcrafted soap in a day, and I don’t miss all the weekends away selling soap and teaching classes at fairs and festivals. I don’t miss the mail order or accounting hassles. But I do miss making soap more than once or twice a year.
I miss it so much that I’m tinkering and thinking about helping out a local shop owner who gets a lot of requests for lye soap. First she asked if I knew anyone who made it. Now she asks when I’m going to bring her samples.
I’ve decided it can’t hurt to make some samples.
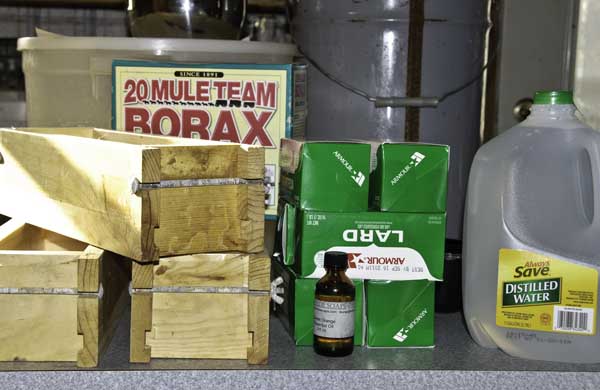
So I gathered the ingredients. Molds, lye, lard. Coconut oil for the Lathering Lye Soap formula I used to make for one shop. Borax and orange essential oil for the Laundry Lye Soap I used to make for a different shop. Distilled water because it works better for soapmaking than our well water, which is exceptionally rich in minerals and has a bit of a sulfur smell.
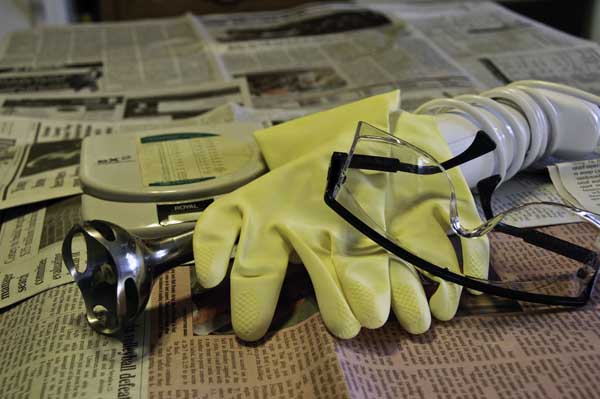
I spread newspapers over my old butcher block table to protect the surface, mainly because it’s old and kind of high maintenance. Rubber gloves protect my hands from lye splashes. Goggles protect my eyes. I like to be careful when I’m working with lye. I’m not scared of it or even a little bit nervous. Common sense and caution are all that’s required to avoid problems. Somewhere around here I also have a heavy vinyl apron for soapmaking, but I couldn’t find it. My ratty old fleece tunic survived the test session without it, though.
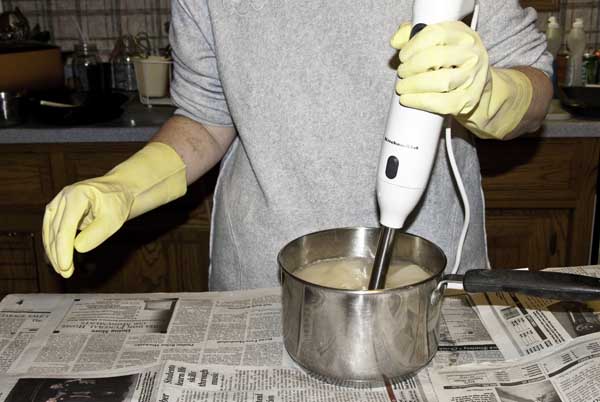
The stainless steel stick blender helps speed up the stirring a bit, and I use it for small batches. I have a big old Hobart mixer with a stainless steel beater for larger batches. Neither’s really needed, but my hand gets tired of stirring with the spoon, and I get impatient. So I like using the electric tools when I can.
Did you see that little postal scale behind the stick blender? It measures in increments of a tenth of an ounce, and is great for measuring herbs, essential oils, and moderate amounts of other ingredients. At least it used to be great. It died halfway through measuring ingredients for my three test batches. (RIP old scale. You gave me many years of reliable service, and I’m grateful. But could you not have held on for another ten minutes?) I had to borrow the good postal scale from the office and bag it in one of the turkey-sized plastic freezer bags. Next week I’m buying a better scale.
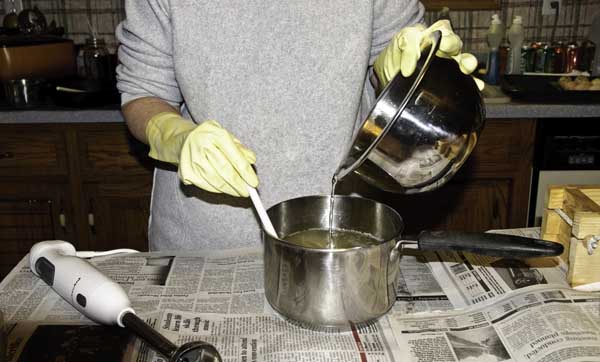
I always mix the lye and water outdoors, remembering to add the lye beads to the water slowly. That keeps the fumes out of the house, and if there’s a breeze to blow the fumes away while I’m stirring, that’s even better. I use stainless steel containers and a heavy plastic spoon for stirring. I melt the oils for big batches of soap in a separate double boiler vat. For small batches, I use regular pans. When the lye and oils are both at the proper temperature for a particular recipe, I slowly add the lye water to the oils, stirring constantly.
A warning about bowls and pans and utensils — always use stainless steel or plastic when working with lye. Stainless steel is impervious to lye, but most other common metals used in kitchen gear are not. The chemical reaction from the wrong metal can ruin the tool and ruin the soap. Glass is also impervious to lye, and I’m comfortable using glass when I’m measuring the oils and lye. I don’t like mixing the lye and water in glass, and I don’t like making the soap in glass containers because I’m a clutz. Lye + glass + me = bad things can happen. I also don’t like using wooden spoons in soapmaking. The wood won’t affect the chemical reaction, but lye’s hard on the wood and wears out the spoons quickly.
If you use plastic when you make soap, use STURDY plastic that can take the heat. Lye water gets really hot. Don’t mix your lye water in an old cottage cheese tub or throwaway Gladware container. They might not be up to the task. Don’t measure out the lye beads with the aluminum measuring cups. Don’t mix your lye in an old aluminum bucket because that’s what you have handy– the lye water will quickly eat a hole in the bottom of the bucket.
I got a bit of lye water splashed onto my arm when I was making this batch. Some people will tell you to just put vinegar on the lye to neutralize it. BAD IDEA. You can get a really nasty chemical burn from the reaction between the lye and vinegar. The correct, safe procedure is rinse under cold water for several minutes to remove the lye, then wipe with vinegar to neutralize any remaining traces. If you’re splashed with the liquid soap while mixing, wipe away the extra, rinse thoroughly (10 minutes or so), then wipe with vinegar. Or just rinse, rinse, rinse and don’t worry about the vinegar. I use it because it eases the discomfort of irritated skin. Actually, vinegar eases a lot of skin irritations, but that’s another blog post.
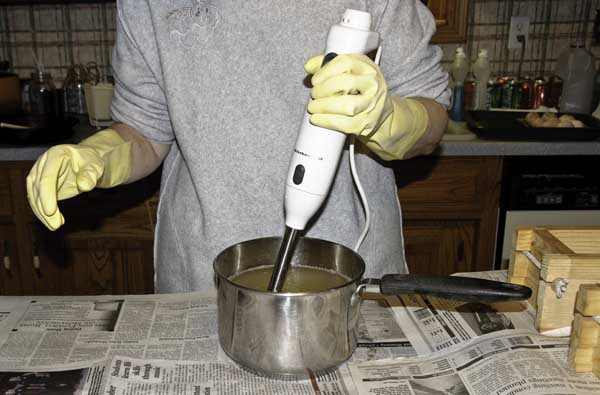
After a bit, I switch to the stick blender. For small batches, I like the straight-sided pans better than a bowl with a curved side, and I prefer not to fill the pan too full.
Be not afraid of using your regular stainless steel cooking pans and other kitchen tools when you make soap. You’re going to wash them when you’re done, right? And what will you wash them with? Detergent or soap, of course. (Stay with me, there’s a point to this.)
A lot of people who either don’t know better or don’t have a lot of common sense will tell you that once lye has touched a utensil, it should never be used for cooking again. Well, why on earth not? The tool is not forever ruined or contaminated. Neither lye nor soap cling to the tools with any tenacity under a spray of warm water. As a matter of fact, lye solutions are used in processing many foods — hominy, masa harina, etc.
I learned about soapmaking from my grandmother, who used her homemade lye soap to launder Grandpa’s work overalls from the machine shop. She made soap in a big pot in the kitchen and stirred it with her big spoon. The next day, she might make a big pot of soup in that pan and stir it with her big spoon. The soup never tasted of soap, and none of us ever sickened from lye poisoning. That’s because she washed her utensils. You’ll wash yours, and I always wash mine.
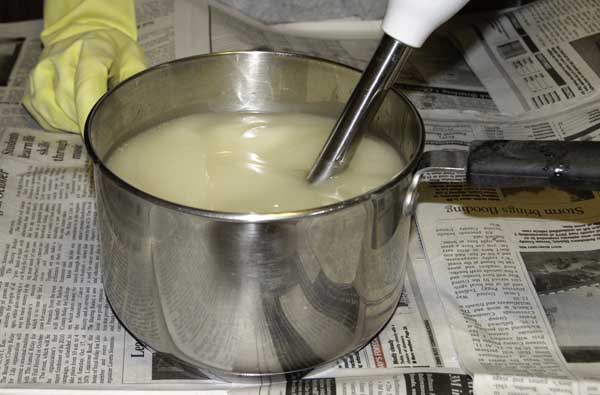
I use the stick blender in short spurts. I don’t want to burn out the motor, and those do heat up quickly. I also want to make sure that any thickening of the mixture is due to the chemical reaction that’s creating soap from lye and fats. It’s easy to make an emulsion of the lye water and fats in the pan with the stick blender, but that’s a poor way to make soap because those quick emulsions commonly separate into lye water and fat globs if poured into the mold too soon.
That’s why I take more time, use the stick blender for a bit, then stir with the spoon for a while. Back and forth, stick blender then spoon, until the mixture thickens a bit, changes color, and doesn’t thin back down after a minute of stirring with the spoon.
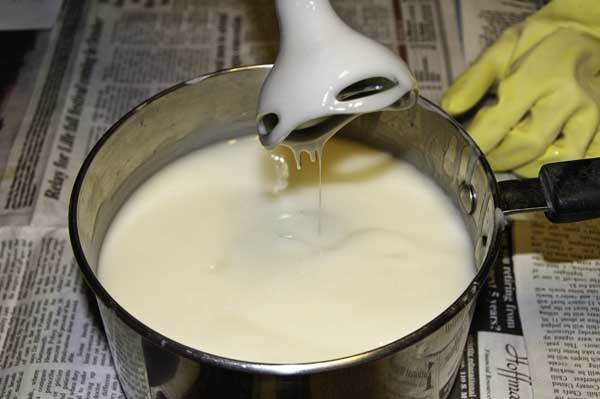
Maybe you’ve heard the term ‘trace’. This is what a light trace looks like in my lye soap formula. A drizzled stream of the mixture leaves a faint trail across the surface, and the mixture itself looks creamy.
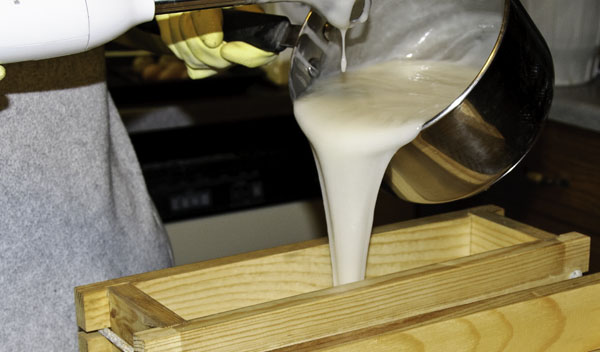
Time to pour it into the wooden mold. I like these molds for 2-3 pound batches of soap. The sides disassemble and make it easy to get the soap out after it’s hardened up some. I used to have a much larger, hinged mold that would hold about 40 pounds of soap.
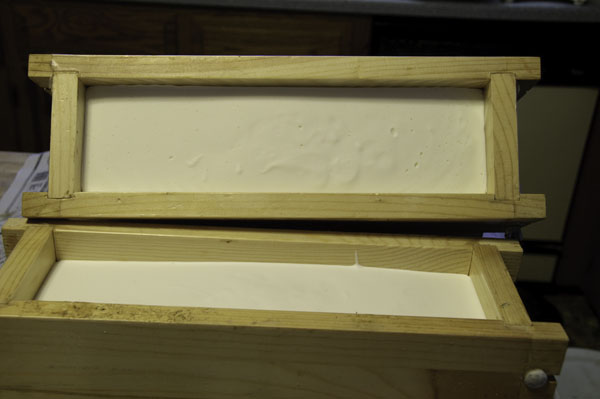
I let these sample batches set overnight. Some recipes set up much more quickly and are ready to unmold in a few hours. Others take days. Each recipe is different, and the time necessary for this stage is affected by how much water is used in the formula and the properties of each ingredient used in a specific formula. The loaf in the front mold in the picture above has a smooth, white surface. The propped up loaf is from the same recipe, but with borax and orange essential oil added. The color a little bit warmer, and the surface isn’t as smooth.
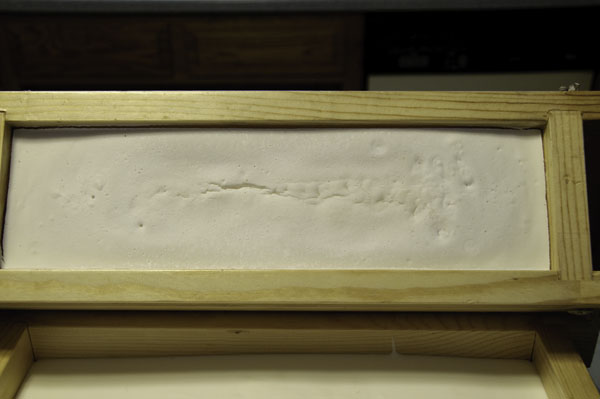
Pictured above is the loaf from the third formula I used in my sample session. This one has coconut oil in the formula, and it set up a bit differently. Notice how the loaf is beginning to pull away from the sides of the mold. The surface also has some dimpling.
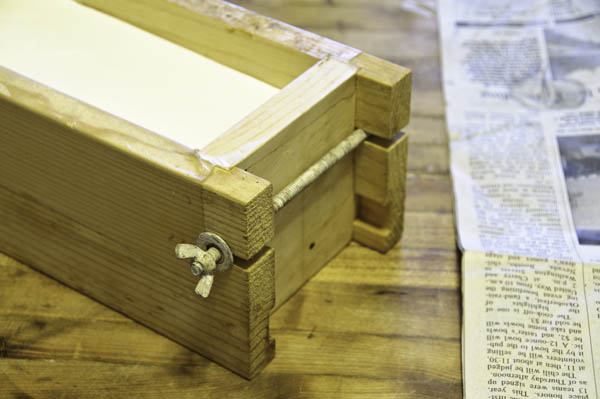
Of all the molds I’ve used, I like these the best. The wing nuts unscrew easily, and the bolts pop right out of their notches for easy disassembly of the mold. I just have to remove the bolts, tap the sides a bit, and pull them off.
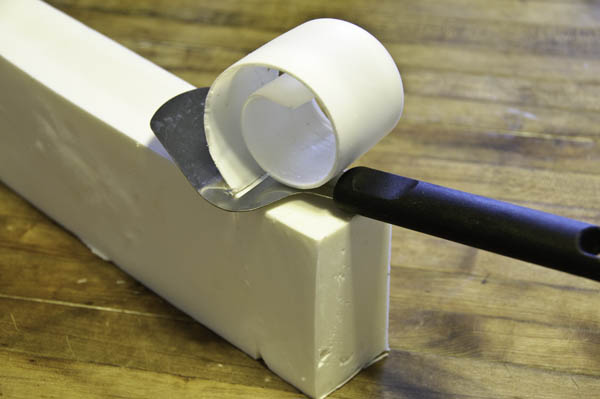
Then I trim any rough spots or dimpling from the loaf with a tool made for sampling cheese. I bought it in the kitchen center at Bed Bath & Beyond. Or Walmart. Or maybe Target.
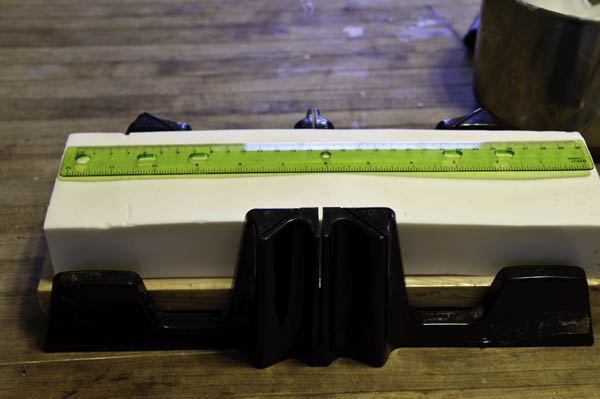
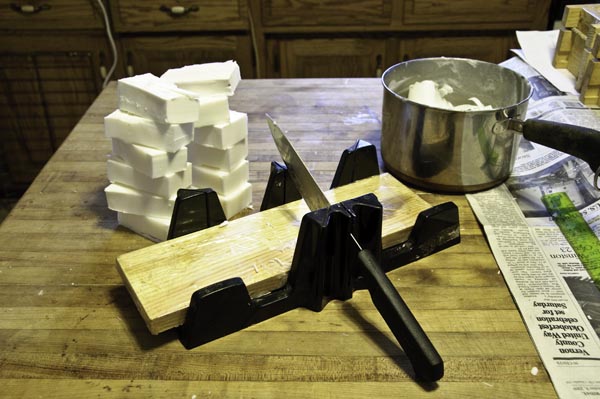
Sometimes I just cut off chunks and call them soap bars. I’m not too picky about the soap I stick in my shower. If I want more consistency in the size of the soap bars, I use a mitre box. The soap loaf sits on a board in the mitre box, and I use a sturdy kitchen knife to cut off inch-thick bars.
Here’s a view from a different angle after I finished cutting the plain lye soap loaf. I ended up with 11 fairly consistent rustic bars and one skinny one from the end of the loaf. Years ago, when I ran the soap company, we had a special cutter that used a stainless steel wire to slice loaves from a large slab of soap. A second cutter cut bars from the loaf. Both were relatively simple in design and were easy to use. If I ever went back to professional soapmaking, I’d buy another set. I just tinker though now, so I don’t need them.
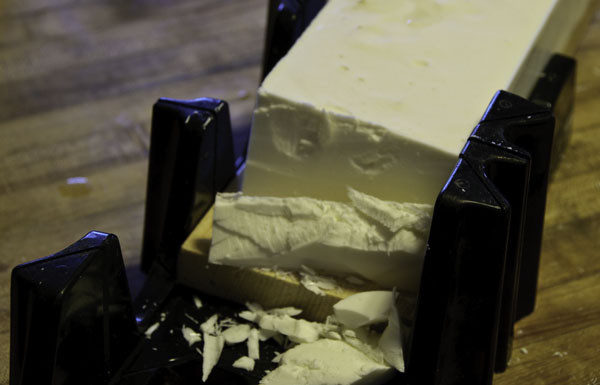
The second loaf, the one with borax and orange oil, was too hard by the time I cut it. So it crumbled and calved in ways that aren’t pretty. It should have been cut hours sooner, and I knew that and expected this would happen. But hours before, there’d been an incident with a heavy box, a high shelf, and broken glasses. . . i.e. the box tipped sooner than I expected, fell on my head, and broke my glasses. I’m fine, and the glasses can probably be repaired. But the soap knows its own time, and I missed it.
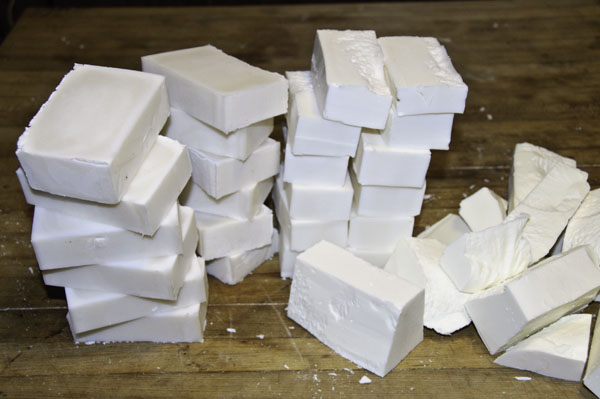
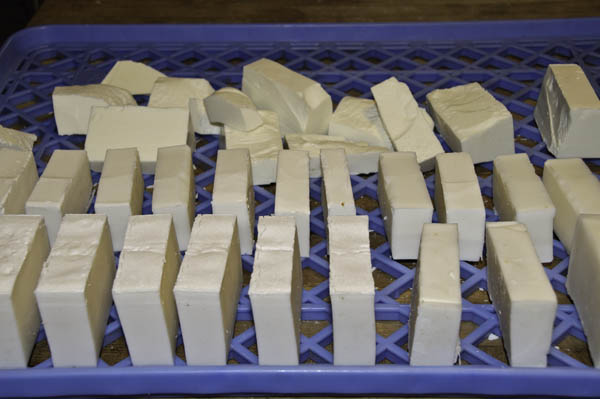
Pictured above are bars (and bits) from all three batches. The two stacks on the left are Lathering Lye. The other two stacks are from the first loaf I cut, an old standard lye soap. The mess at the right is the Laundry Lye, which smells lovely and will be perfect for grating into laundry soap if that’s what I decide to do with it. I’ll take that big chunk in the front with samples from the other batch to the shop owner. If she decides that’s the type she wants, I’ll make more. And I’ll make sure I cut that next batch on time.
I set the bars on end on an old bread tray I acquired a few years ago. I have proper shelves for curing soap in the storage room, but they’re filled with canning jars now. The air circulation in that room isn’t optimal for soap anyway. So these days, since I’m just tinkering anyway, I make do with the old bread tray. I can prop the corners up on old coffee mugs, so there’s good air circulation around all sides of the soap.
Years ago, when I was running the soap company, I used to teach soapmaking at fairs, festivals, and conferences. I taught soapmaking in an adult education program for several years, too. I miss the teaching, and I miss the commaraderie of sharing craftsmanship tips with other soapmakers. But I’m only tinkering now and not going back into the business, so I’ll probably keep on missing those things.
I might post my teaching recipe on the blog someday though, along with a photographic tutorial.



found your site on del.icio.us today and really liked it.. i bookmarked it and will be back to check it out some more later
nice tute! will be linking it 🙂
thanks for sharing.
Genial dispatch and this mail helped me alot in my college assignement. Say thank you you on your information.
Hi. Thanks for sharing the information! so you don’t have to line the mold? i thought soap would stick to the wood!
do you mind sharing info on how the big mold (30-40lb) look like? My BIL is a pretty good woodcrafting and he could use some extra cash from making some for the soapmakers. TIA.
mic – All my wooden molds are lined with clear contact paper or shrink wrap. Both have to be replaced once in a while, but it beats having to re-line with each batch. The old big mold had a one piece, removeable bottom that fit into grooves on the side pieces. The four sides were made from separate boards. I can’t remember what type of wood, just that it was planed smooth with no knots or noticeable flaws. Three corners had sturdy 3-inch hinges. The fourth corner had a door hinge with a removeable pin for securing it.